With Jali, you can design and create made to measure cupboards online, including cupboards to fit inside alcoves. For example, one popular occurrence is to fit a cupboard either side of a chimney breast.
As standard, Jali alcove cupboards are intended to fit fully inside an alcove, either flush with the front or slightly recessed back. However, some people prefer a variation on this design where the cupboard extends into the room, fitting around one or both front corners. This allows more storage space, and the doors to open a little wider, although it does require some extra DIY. In this article we’ll explore the options, and discuss how you can achieve the protruding cupboard look with Jali.
This approach is identical for Jali cupboards and bookcases. Although slightly more expensive, a Jali wardrobe (constructed in a different way) can accommodate the protruding corner natively within the Jali designer. In some cases it may make sense to use the wardrobe instead.
Recessed Alcove Cupboard
Jali Alcove Cupboard Recessed
If you’ve never used the Jali designer before, head over to the cupboards page, choose any example you like and then click ‘Customise’. To create an alcove cupboard in the Jali designer, select the Advanced menu, then Situation, and then Alcove.
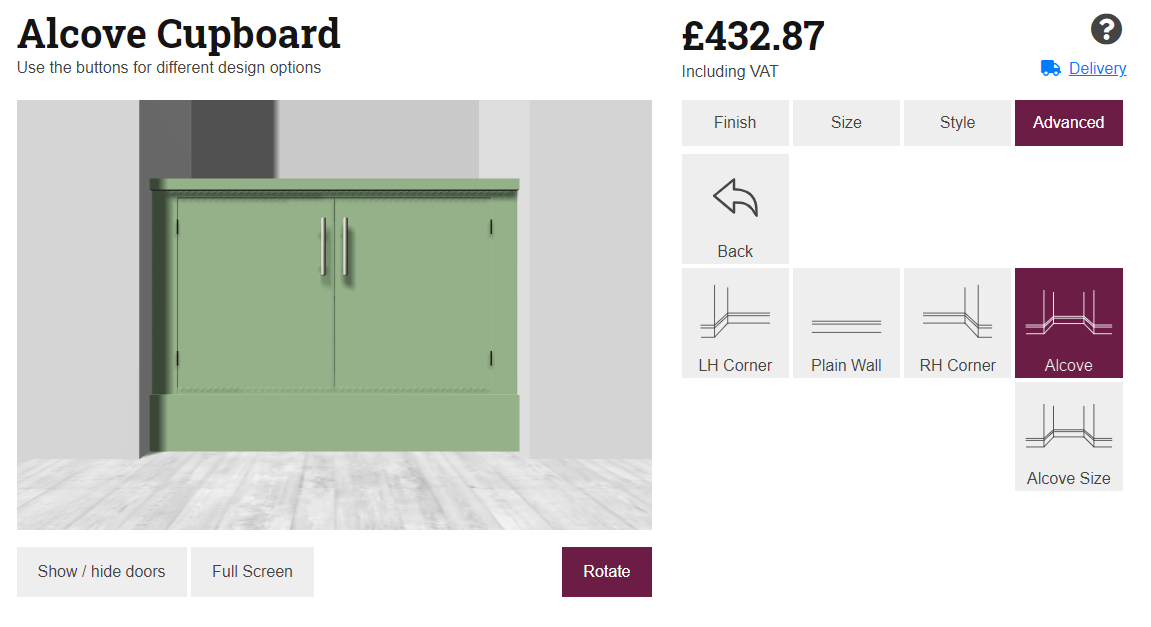
You can then click Alcove Size, and enter your alcove width. This automatically adjusts the cabinet size, which adapts to fit the available width. You’ll also want to go to the Size menu and click Side. Here you can adjust the unit depth, and ensure it’s not greater than the alcove depth.
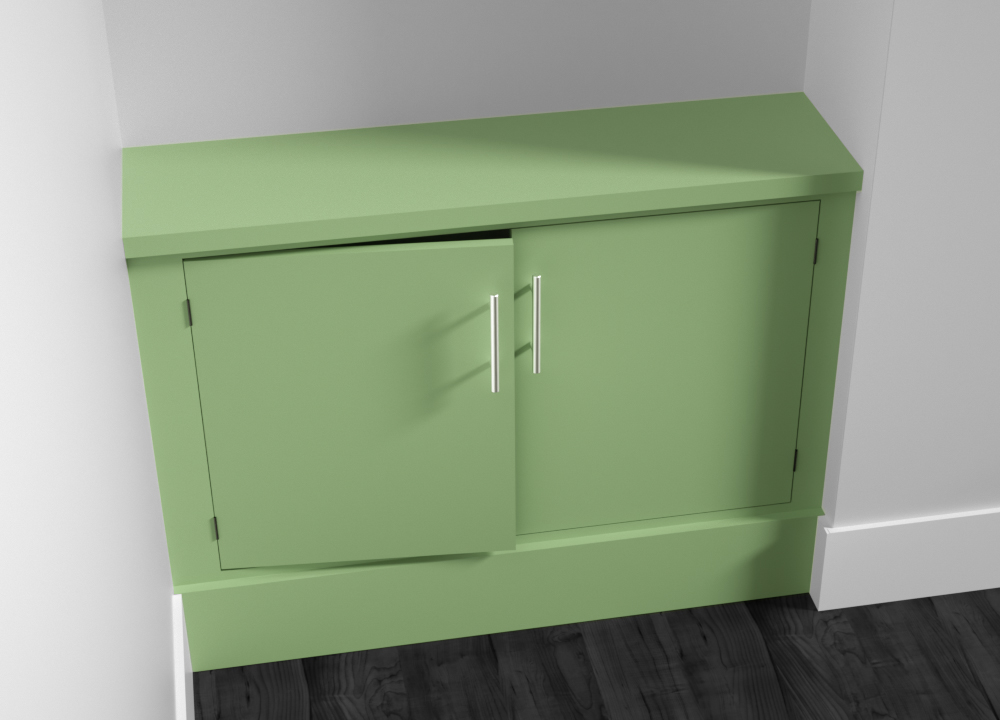
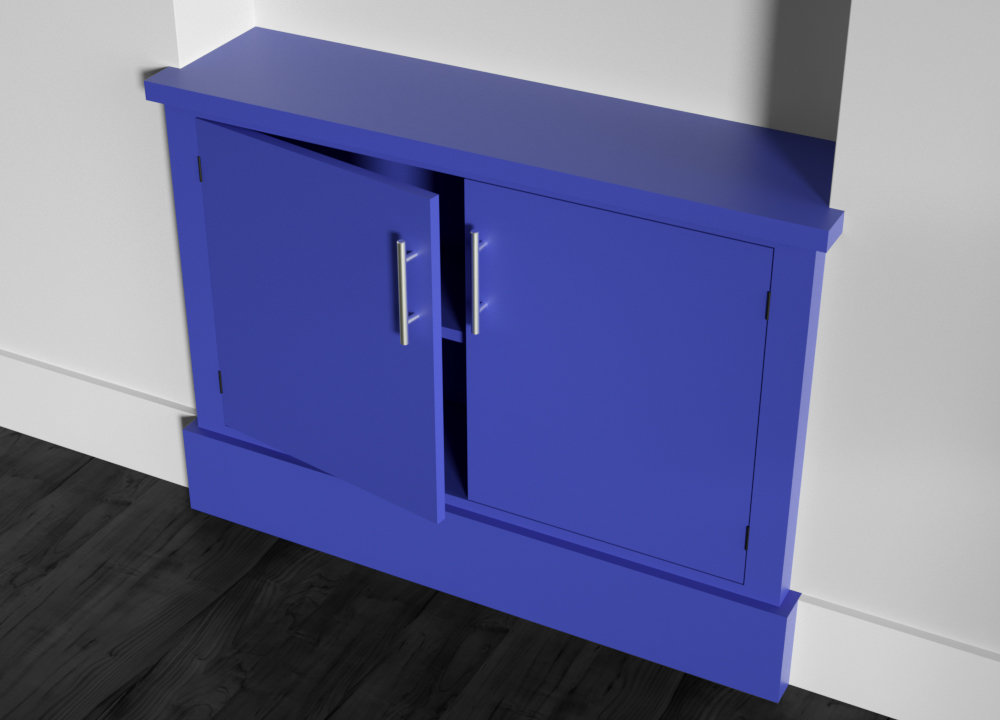
Protruding Alcove Cupboard
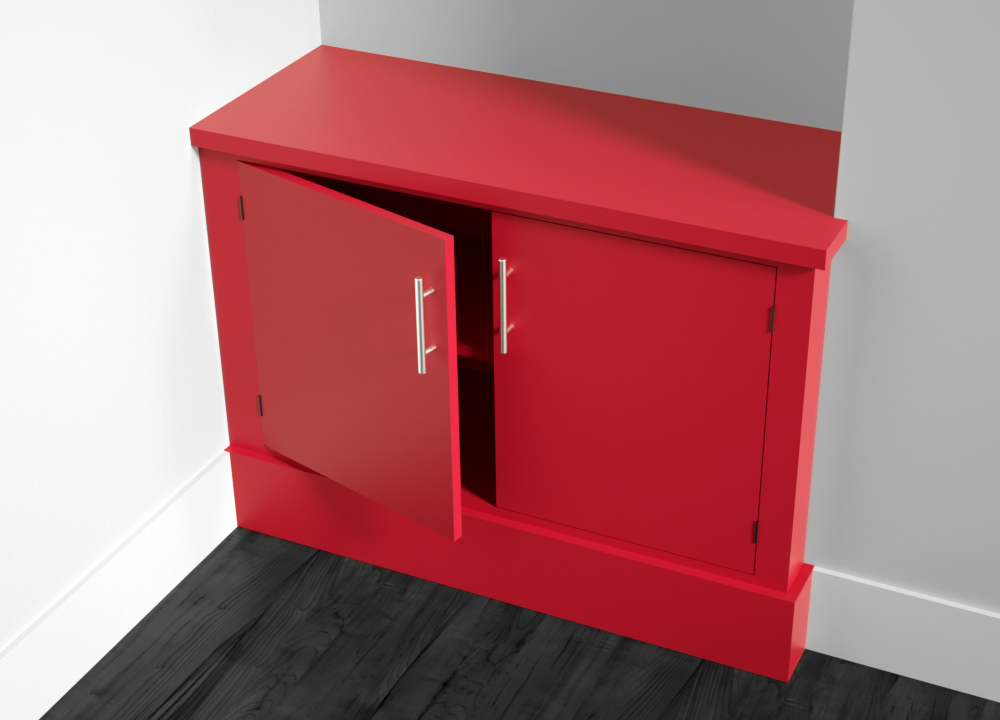
Jali Alcove Cupboard Protruding on Right Side
To achieve this look instead, you should not use the alcove option in the Jali designer mentioned above. Instead, you need to make the unit side fitting, on the ‘wall’ side (rather than the protruding side). In this example it’s the left, and so LH Corner is selected.
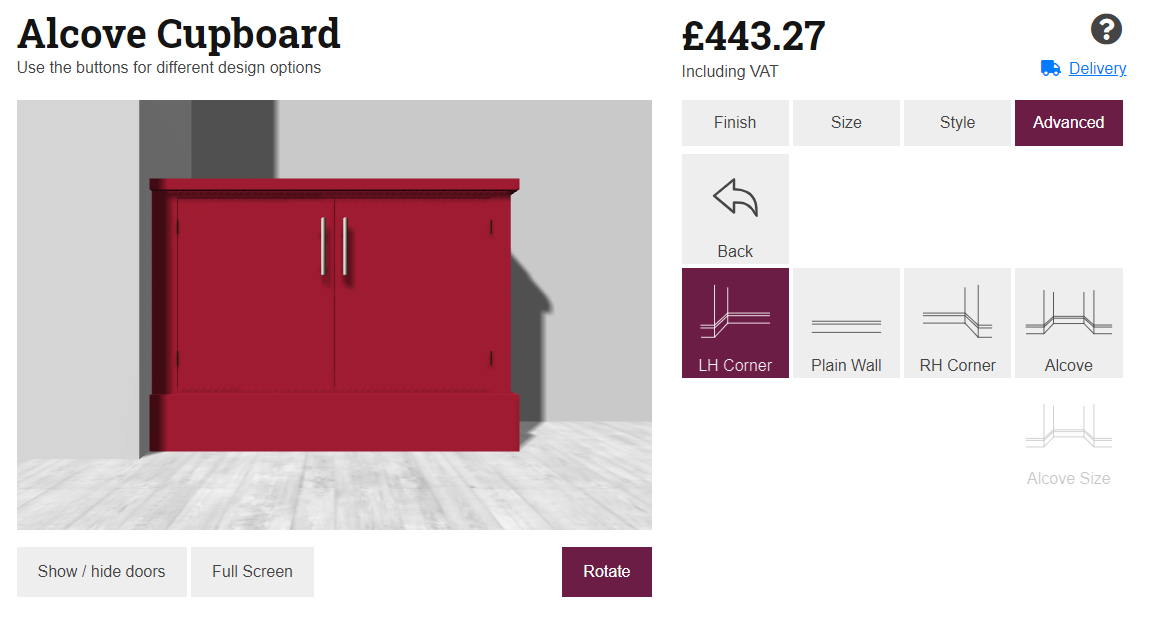
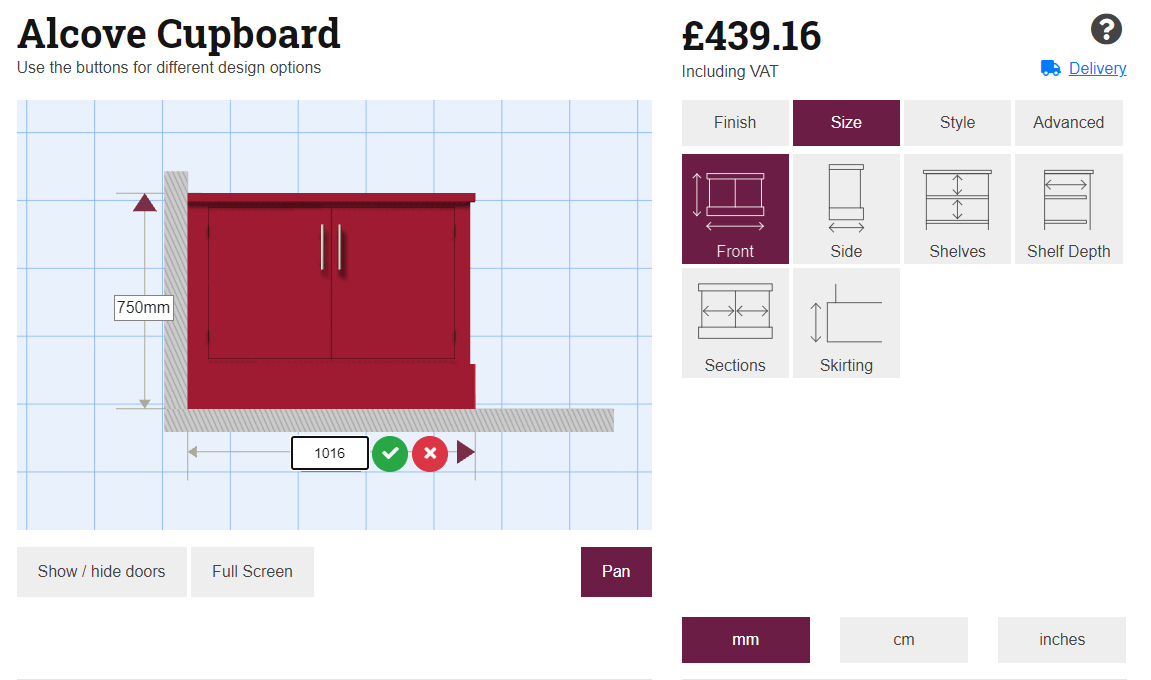
The width can be set under the Size menu, and Front. This is critical, and it does depend a little bit on how straight the walls are. In general, we recommend that the width be set to: Alcove Width + 16mm.
In the example, the alcove is 1 metre wide, and therefore the cabinet width is to set 1016mm. Because of the way the Jali cupboard is constructed, it isn’t possible to extend the unit further across the chimney breast.
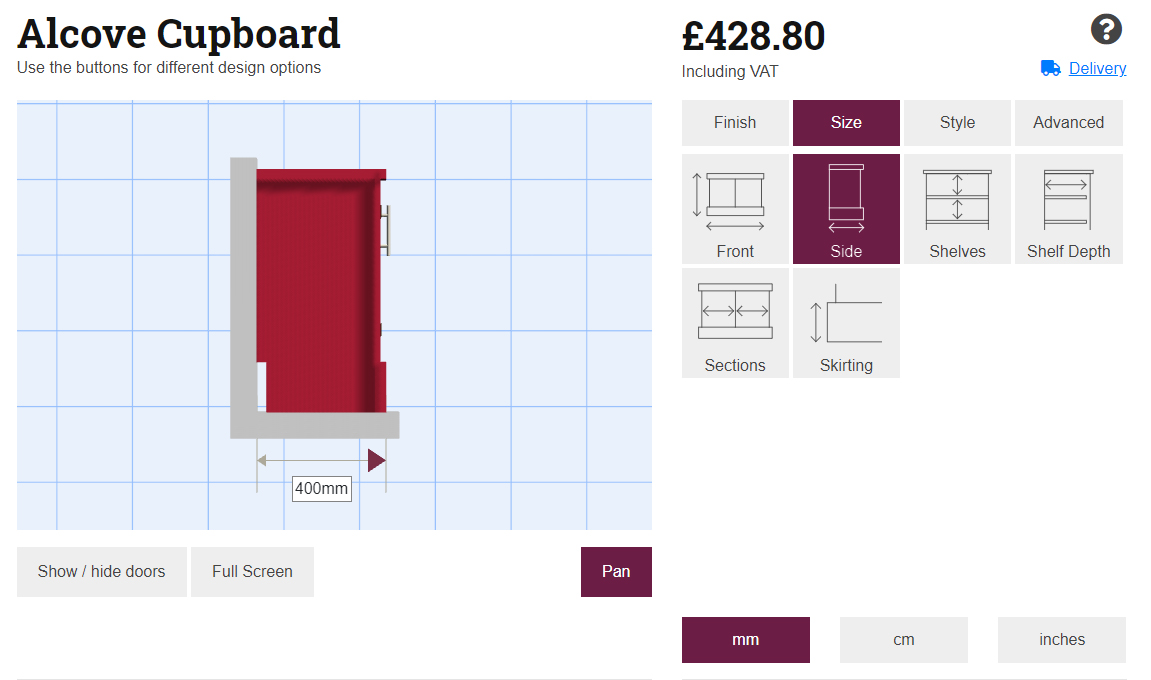
The cupboard depth can be adjusted by clicking Side. It should be deeper than the actual alcove depth. Under Skirting, you can adjust the unit skirting height to match your room/alcove skirting board.
The room skirting inside the alcove, on the protruding side, will need to be removed to make room for the unit. Although the back and opposite side skirting may as well be removed too, they can likely remain. There is a gap at the back of the unit to allow for room skirting, which could be amended if necessary.
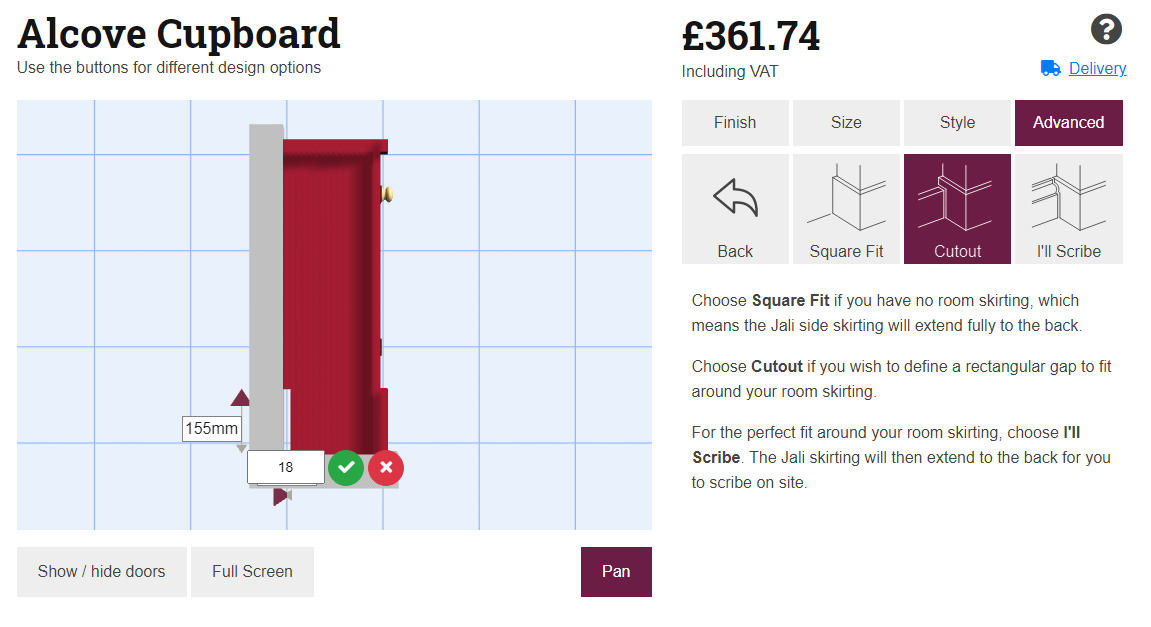
On the wall side of the alcove (opposite the protruding side), the relevant gap is defined by the Inset width. The Inset is often set to 18mm by default, which leaves sufficient clearance for most room skirting – as long as it’s not deeper than 18mm. However, it can be amended under the Advanced menu, Fitting and then by clicking Insets. For example, if your alcove skirting was more than 18mm thick, or if the walls aren’t especially straight, you might choose to increase the relevant Inset to at least 20mm.

The result will be exactly as represented in the 3D designer, so it will not fit into the alcove without some extra DIY. The top will need scribing to allow it to fit into place. The cupboard side skirting on the protruding side must be cut to length, and if preferred, scribed to fit the existing room skirting board.
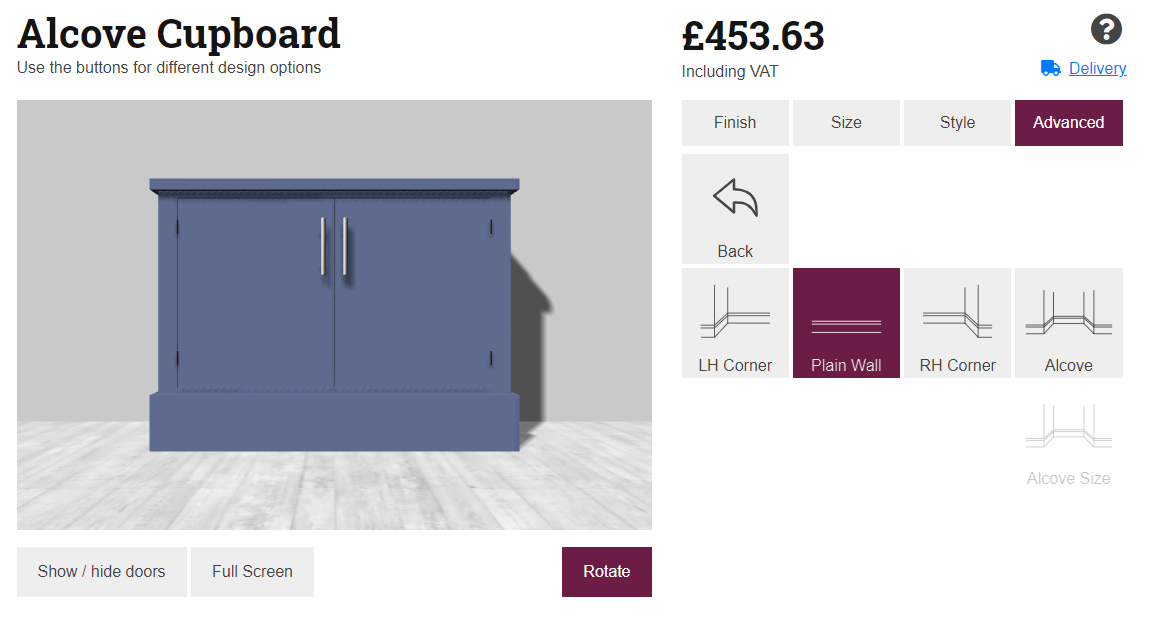
Protruding Alcove Cupboard on Both Sides
You can achieve the same result as above, but with the cupboard protruding on both sides of an alcove. Under Advanced and Situation, select Plain Wall instead. Then, Under Size and Front, set the width to: Alcove Width + 32mm. The result will require scribing on both sides.
All these DIY tasks are relatively easy to carry out, but please only attempt them if you are confident that you can do so safely. The results are definitely worth it. Happy DIYing!