Back in August, we featured some modern DIY magic made by our clever customer John. Well, he’s been at it again – and he’s documented his latest project using Jali products so we can all see exactly how he did it. We think it’s fantastic, and that John should be really proud of what he’s achieved. It’s made the rest of us (okay, probably just me) feel just a teensy bit exhausted.
So here’s John’s account of his latest Jali-assisted triumph, while I go to have a little lie-down.
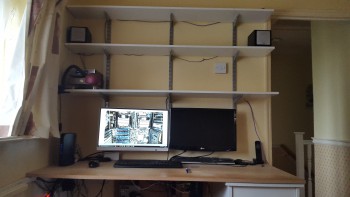
“Before – horrible shelves, piles of cables, and screens that are fixed to the wall with horrible brackets – cannot adjust the height – and the screens don’t match.
And when the screens come down, there’s a lot of holes in the wall where they were fixed – so that also needs to be covered up.
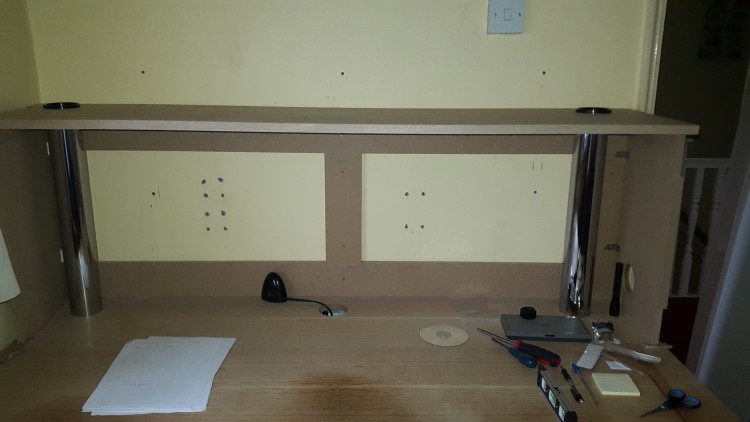
The desktop was ordered previously, as was the small set of drawers. The desktop has 3 x 80mm holes already drilled for dropping various cables through (although one is directly above the drawers, so not really useable).
The masterplan – order a set of flexi-shelves, and a series of mdf shapes, all in oak veneer, and some more mdf shapes as frames and templates. The various shapes will all become clear as we go along.
Step 1, after disconnecting everything, and removing the old shelves…
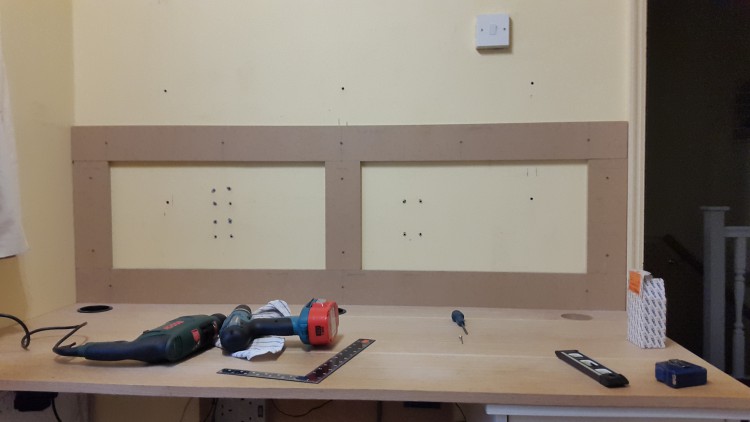
A framework goes on the wall – you can see all the holes from the old brackets – and at the moment we’ll conveniently just ignore the light switch – that’s another ongoing saga….
This framework will hold an oak panel as well as providing a bit of support for the shelf unit – as we know how heavy this stuff is. Two of the 80mm holes can be seen – one on the left still has the plastic grommet in place, on the right its just a plain hole.
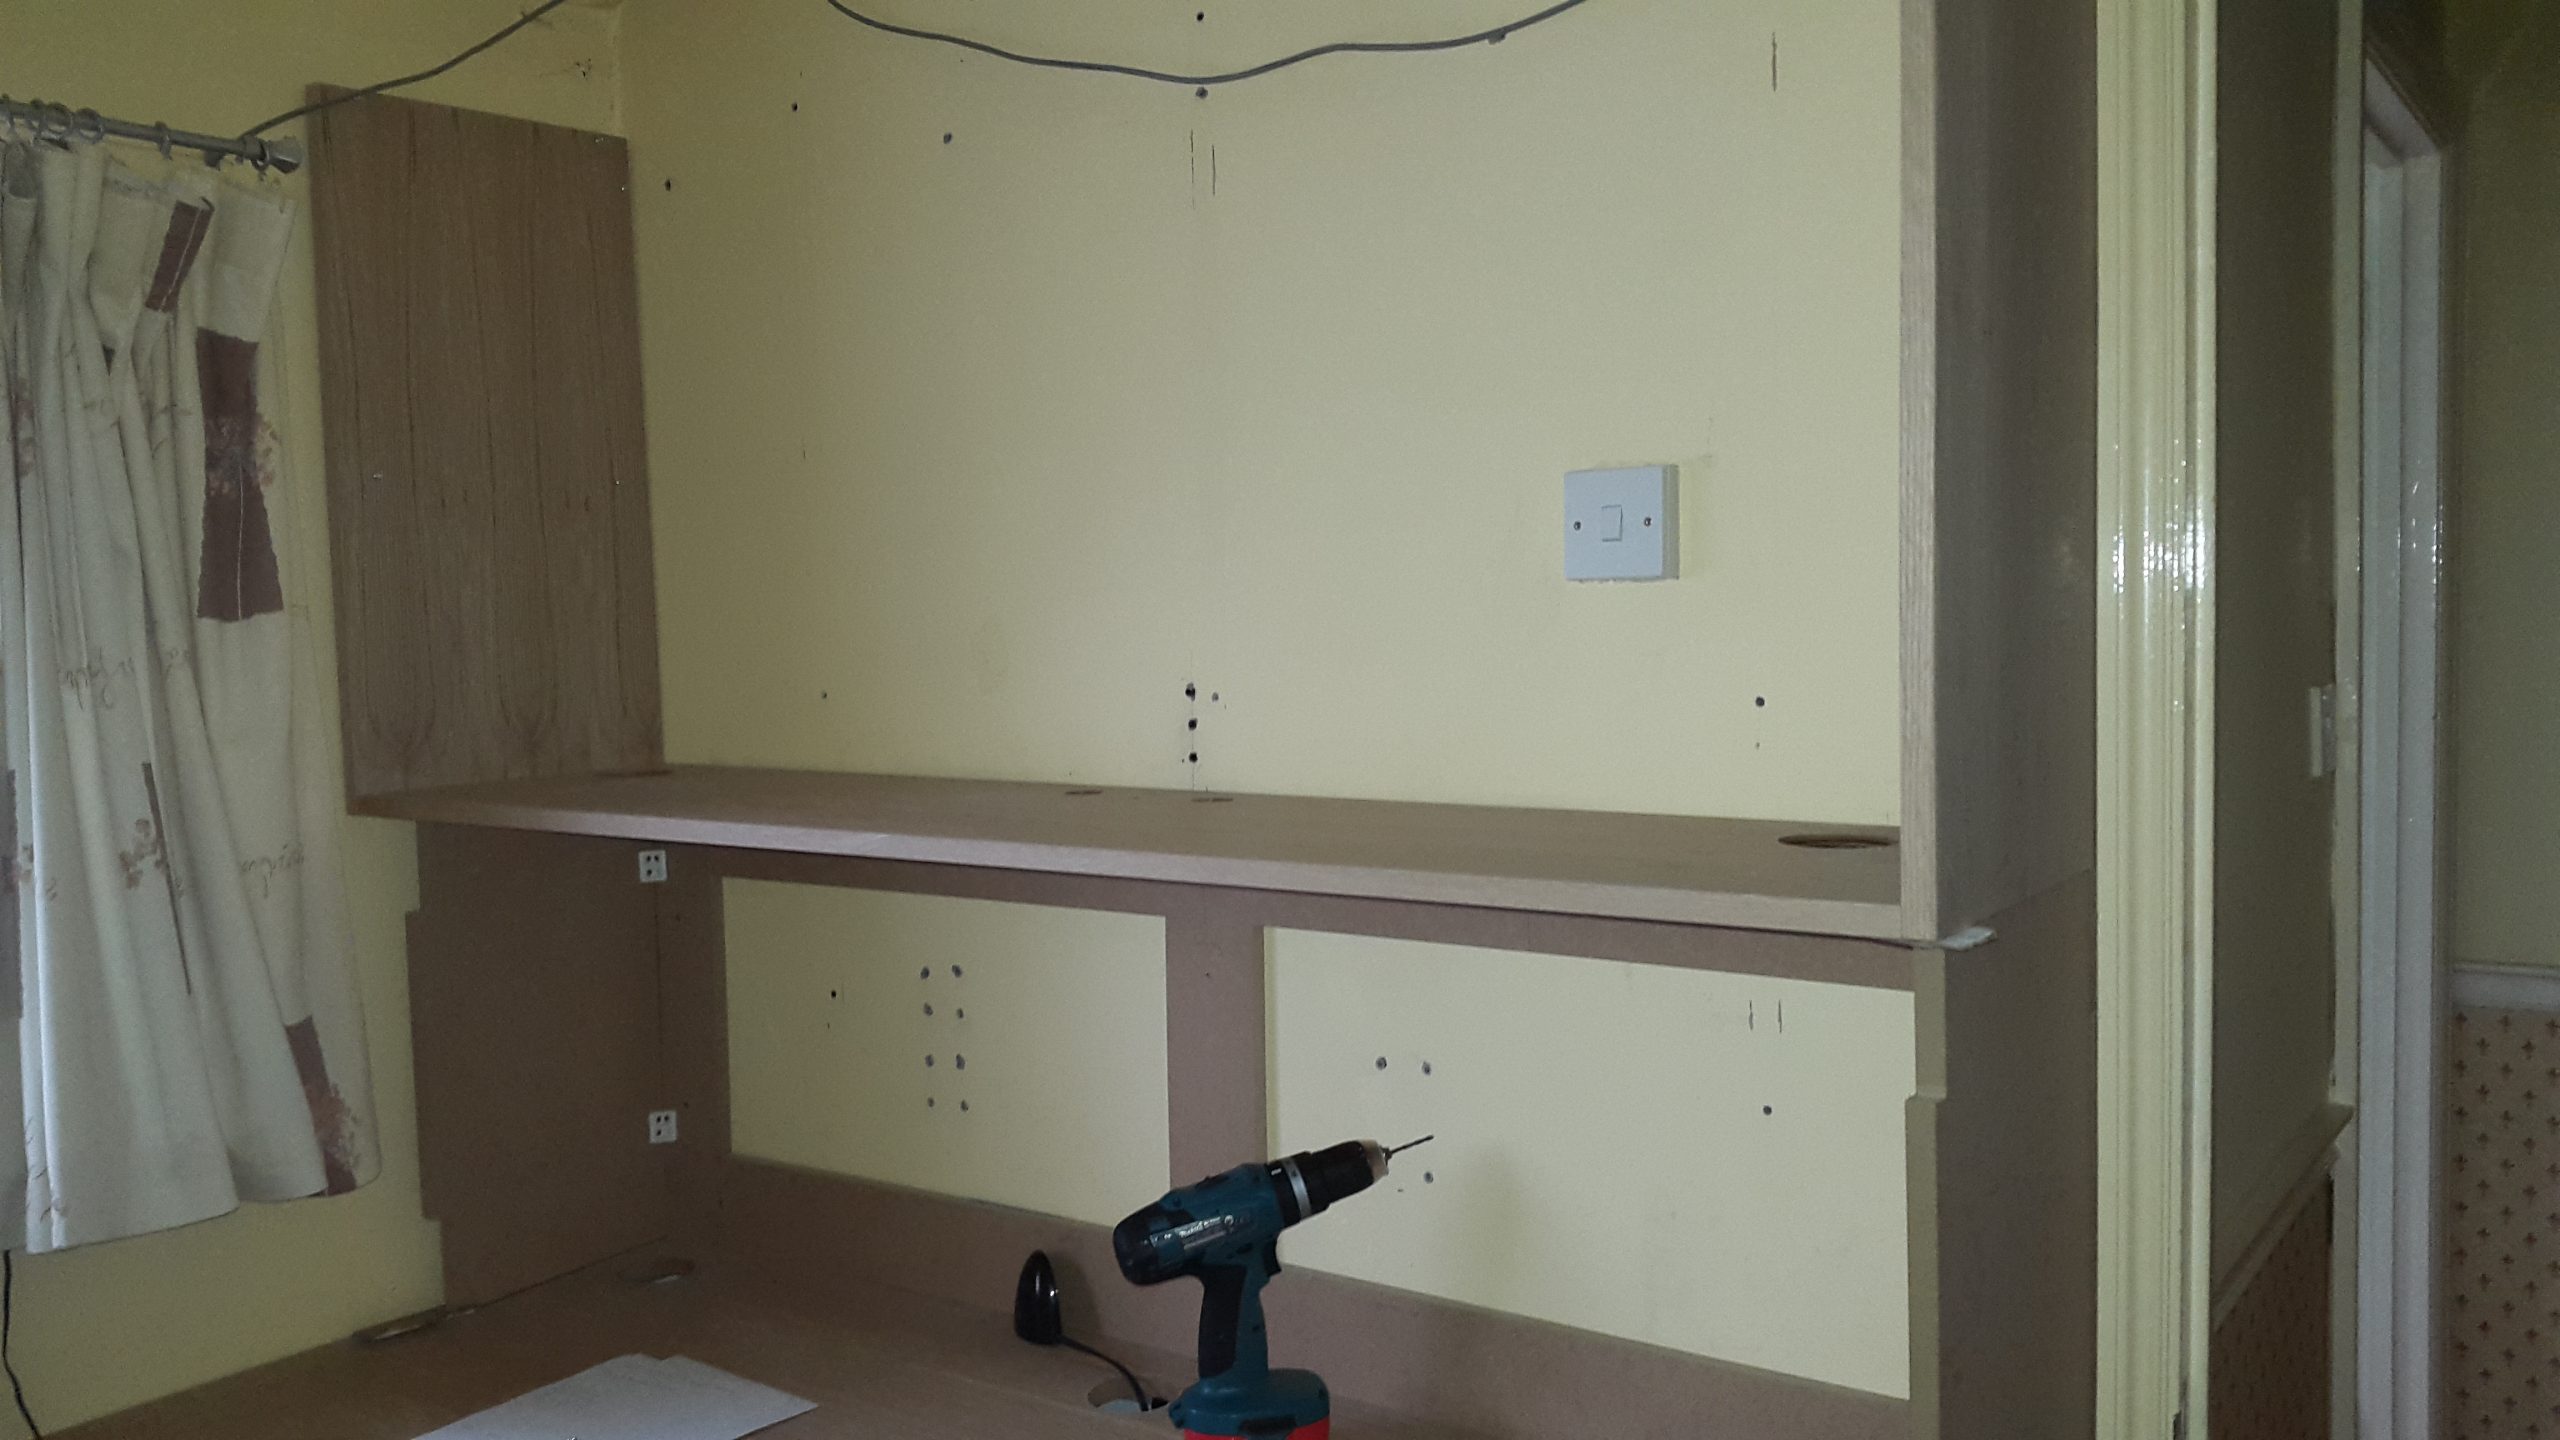
Step 2. Using a couple of mdf shapes as supports, the bottom and sides go in place. This is not put together on the floor and then lifted – its just too heavy – so will be built up bit by bit.
And at this point, found out the holes that I cut into the bottom shelf do not line up with those in the desktop, I missed by 19mm – the width of the side panel. There was a period of colourful language, then calmed down and phoned Jali – who were very understanding, and didn’t laugh too much.. a replacement piece will arrive next week
(Big sigh of relief)
So, while waiting for the replacement, I used the old shelves as templates to get all the holes properly lined up – also to account for wavy walls – which can be seen in the top of the last picture – there’s a gap almost 20mm at the centre – while the sides are flush. I don’t think the original builders had a level or square…
A working template in place, on the temporary supports..
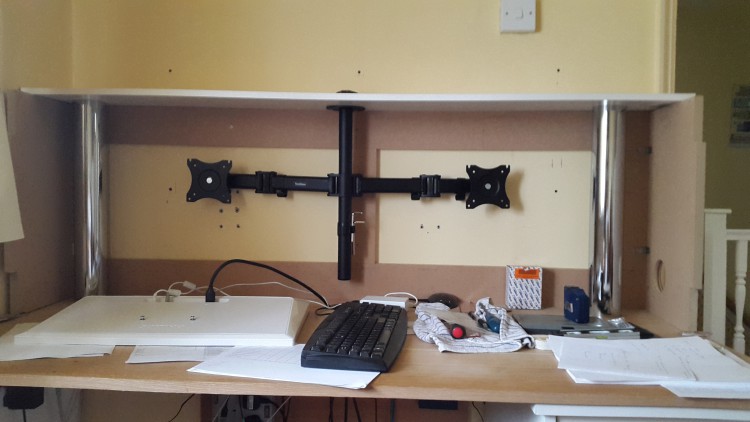
This shows the reason for the 80mm holes – the chrome tubes (table legs actually) are to run the cables, and the screens will hang from the shelf on the dramatic looking bracket.
You can see how flexible an old chipboard shelf is…..
And this is the replacement shelf, now with the holes in the correct place.
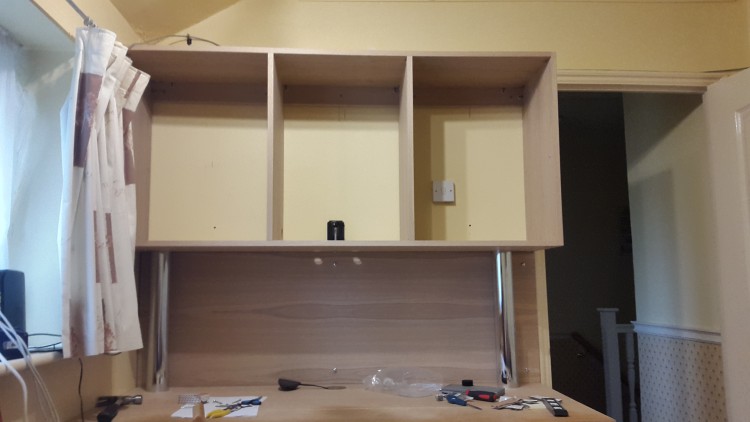
The sides go up…and in the centre, 3 more holes have appeared in the wall… there is a reason for this.
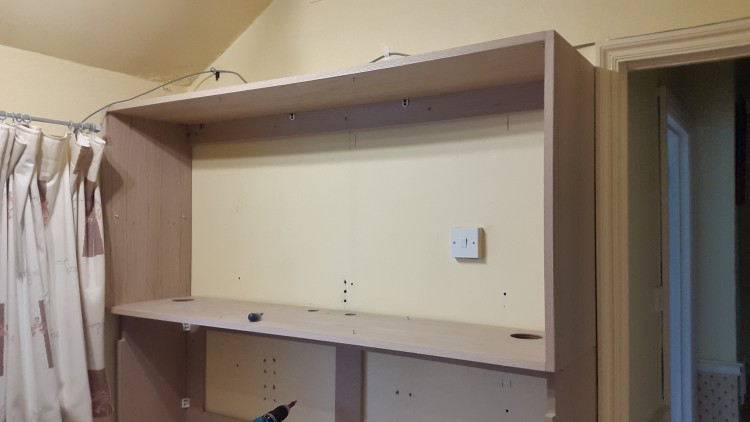
The top goes on… and the top rail is fixed to the wall – with some very large fixings.
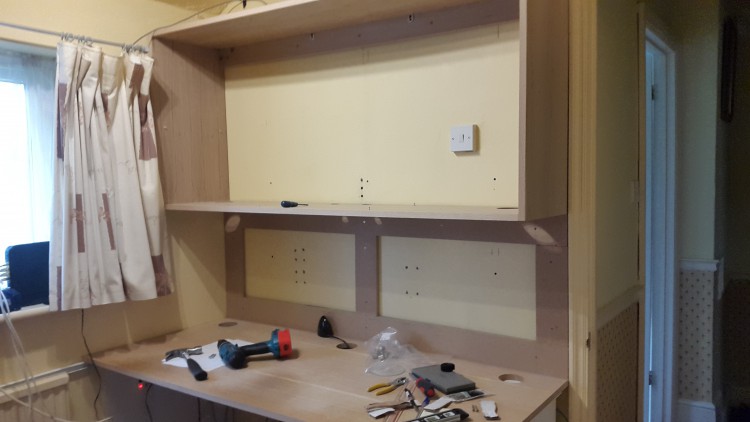
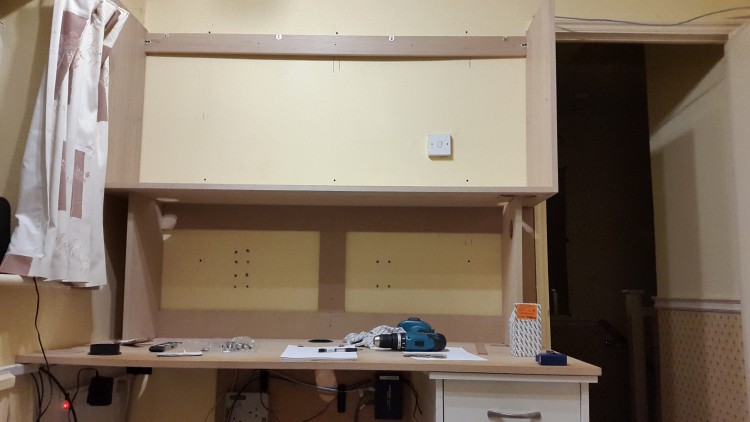
And the temporary supports come down. The angle shaped patches on the frame are not supports – that’s just the light shining through the holes.

The uprights go in, and a substantial metal bracket will support the screens – the chrome tubes are back in place..this time – in the correct place.
And an oak panel (mdf veneer) goes on the back wall to cover the previous carnage.
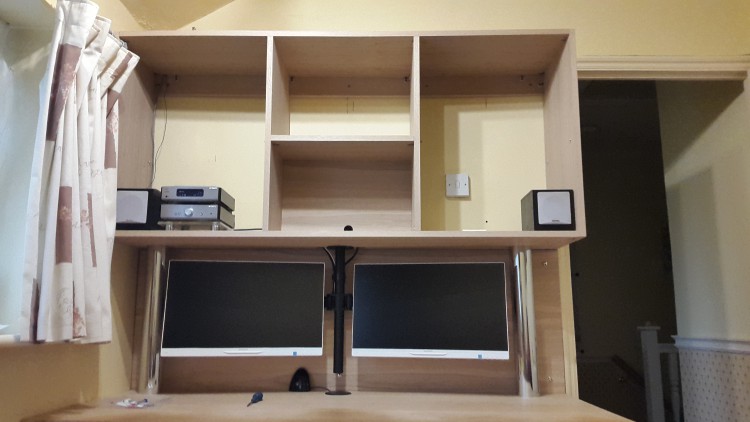
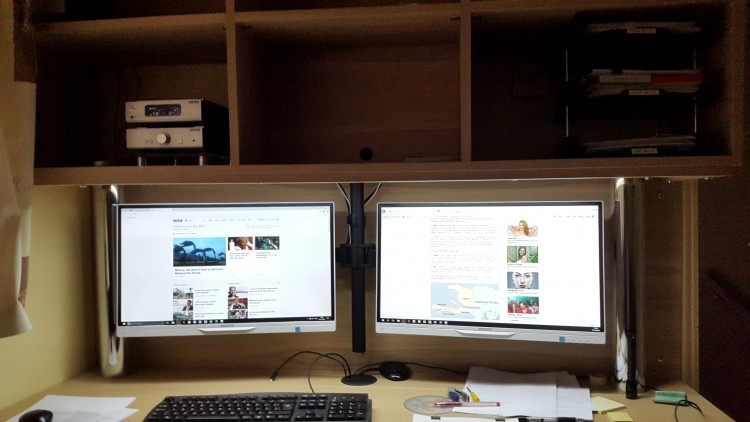
The screens are in place, and cables tidied away. The radio is back (most important).
I did treat myself to a second screen that matched the first one.
The centre section of the shelving now has a panel of mdf oak veneer. This is inserted to cover up the cables and power adapters for the 2 screens, as well as the top of the bracket. Its got a 38mm hole to make sure it can be removed easily – it was a very snug fit.
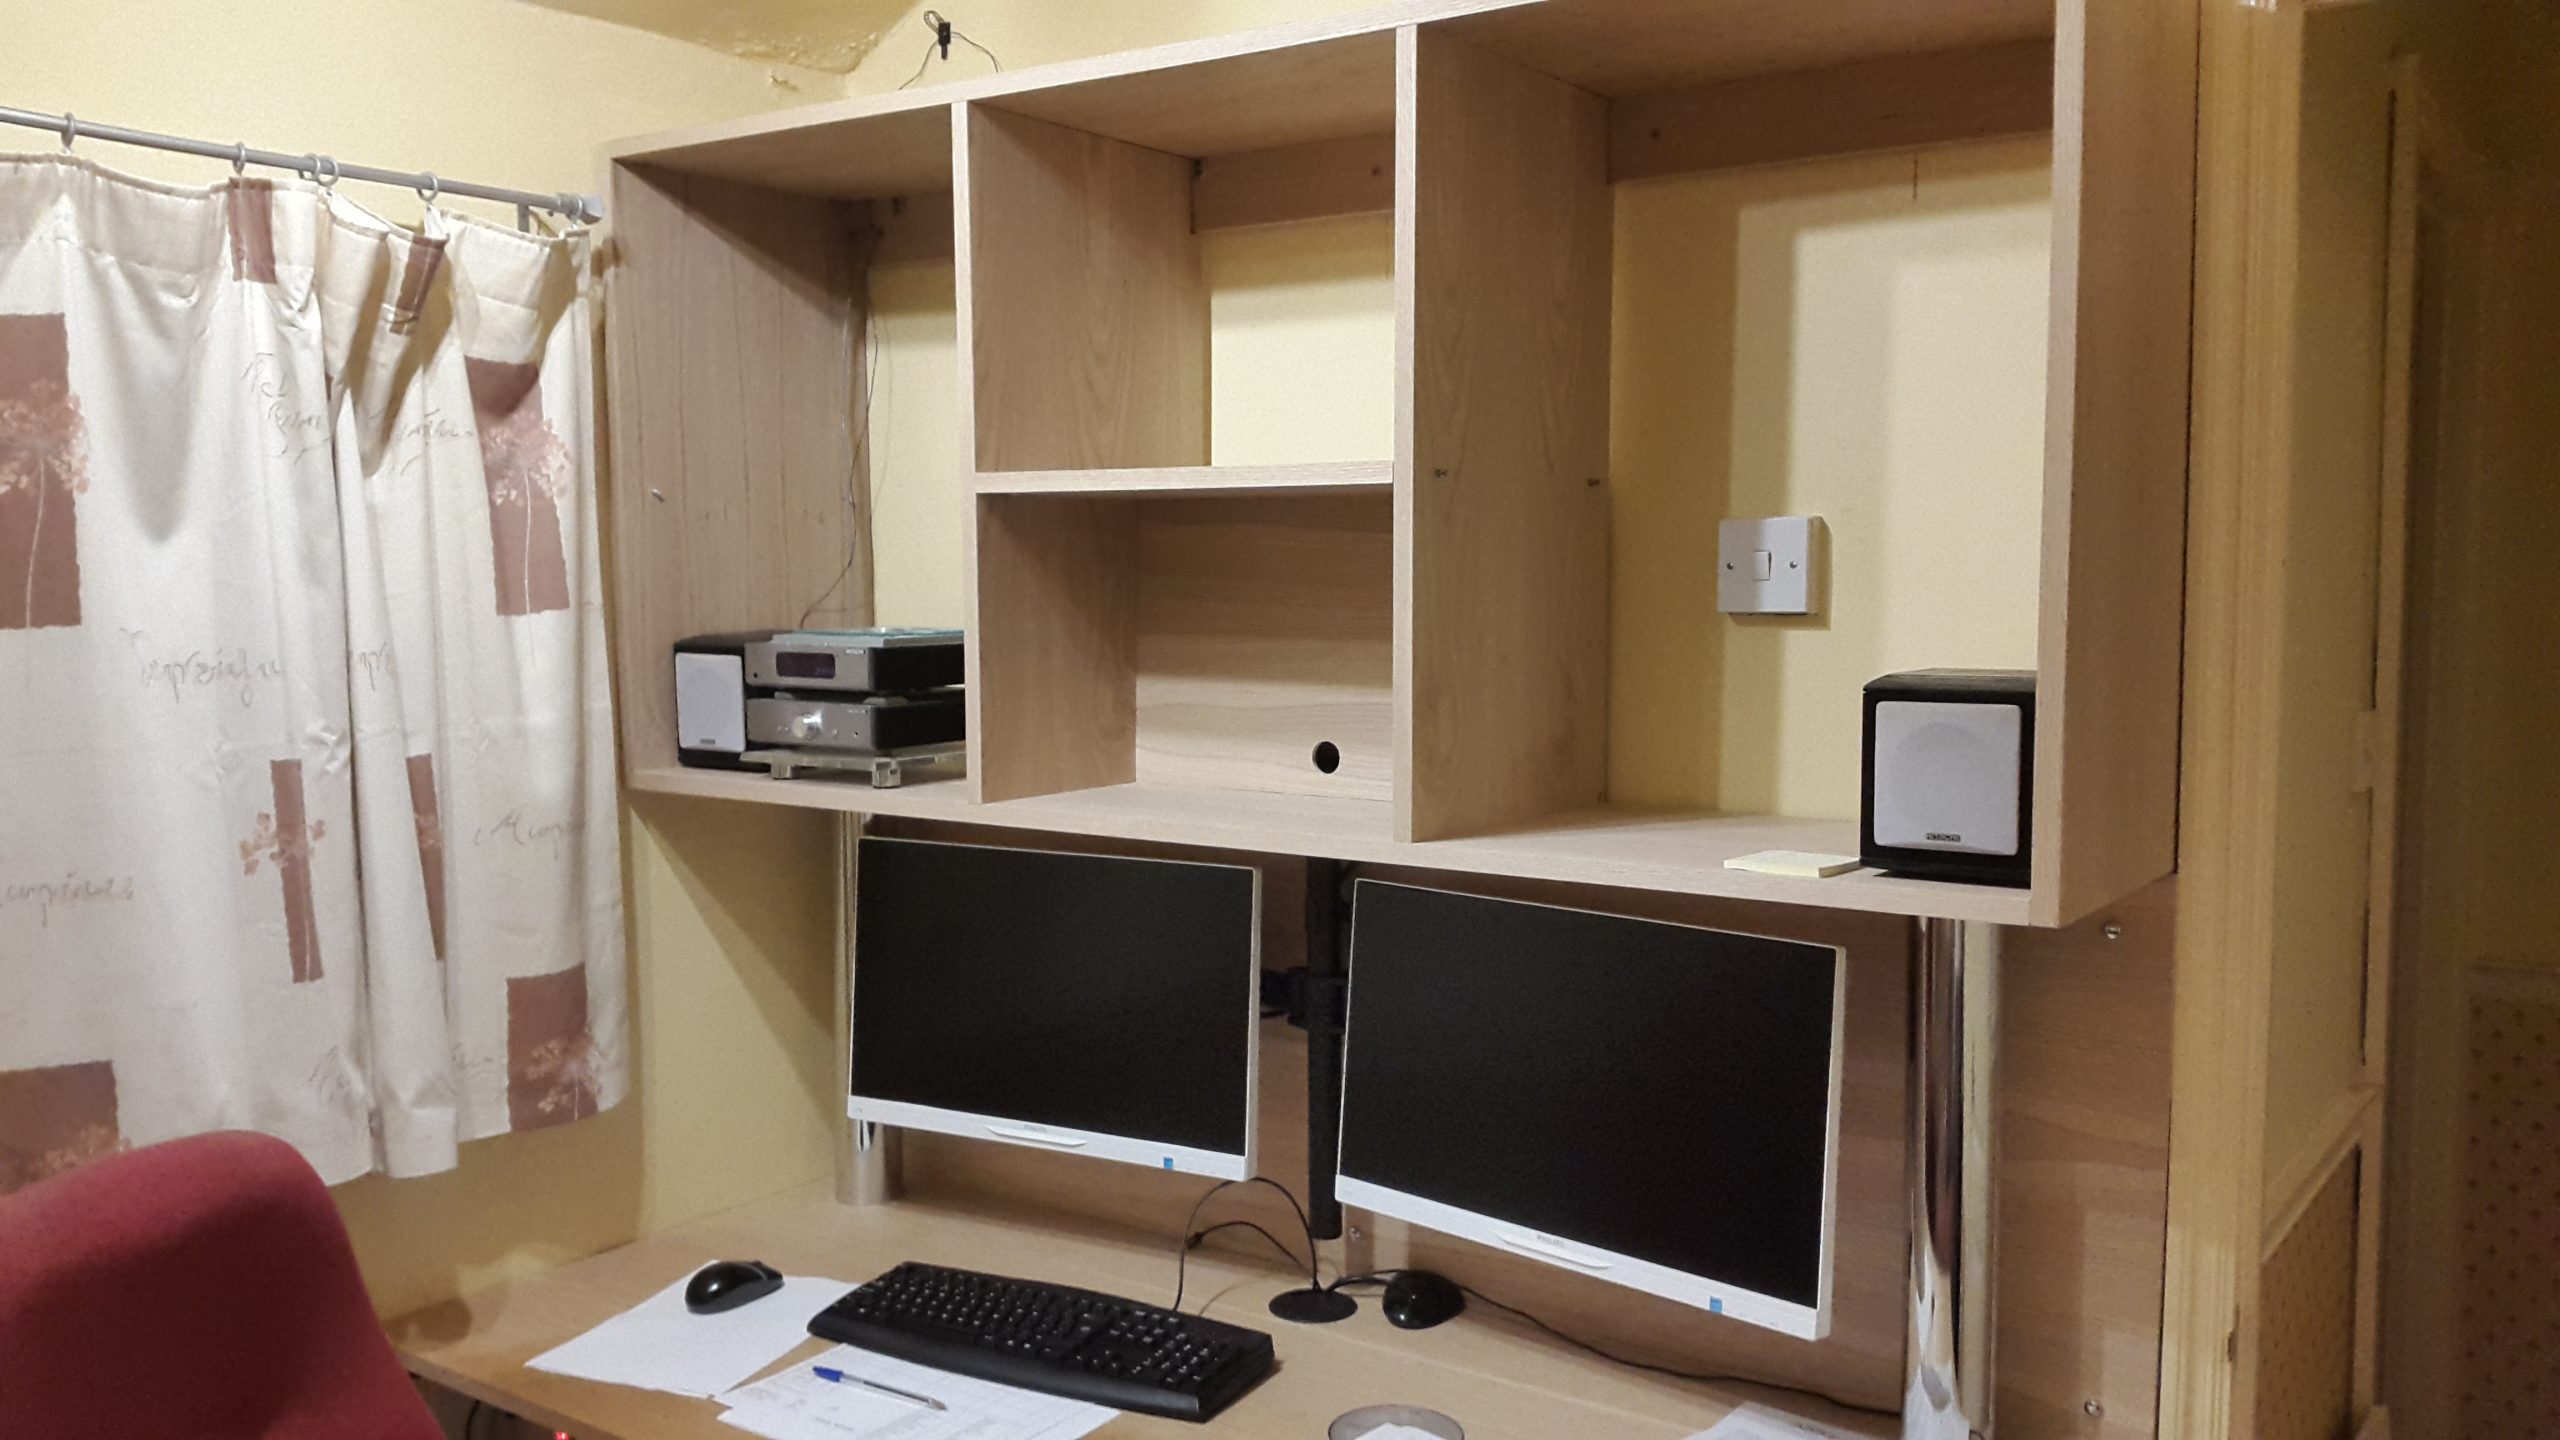
Same thing – just a different angle
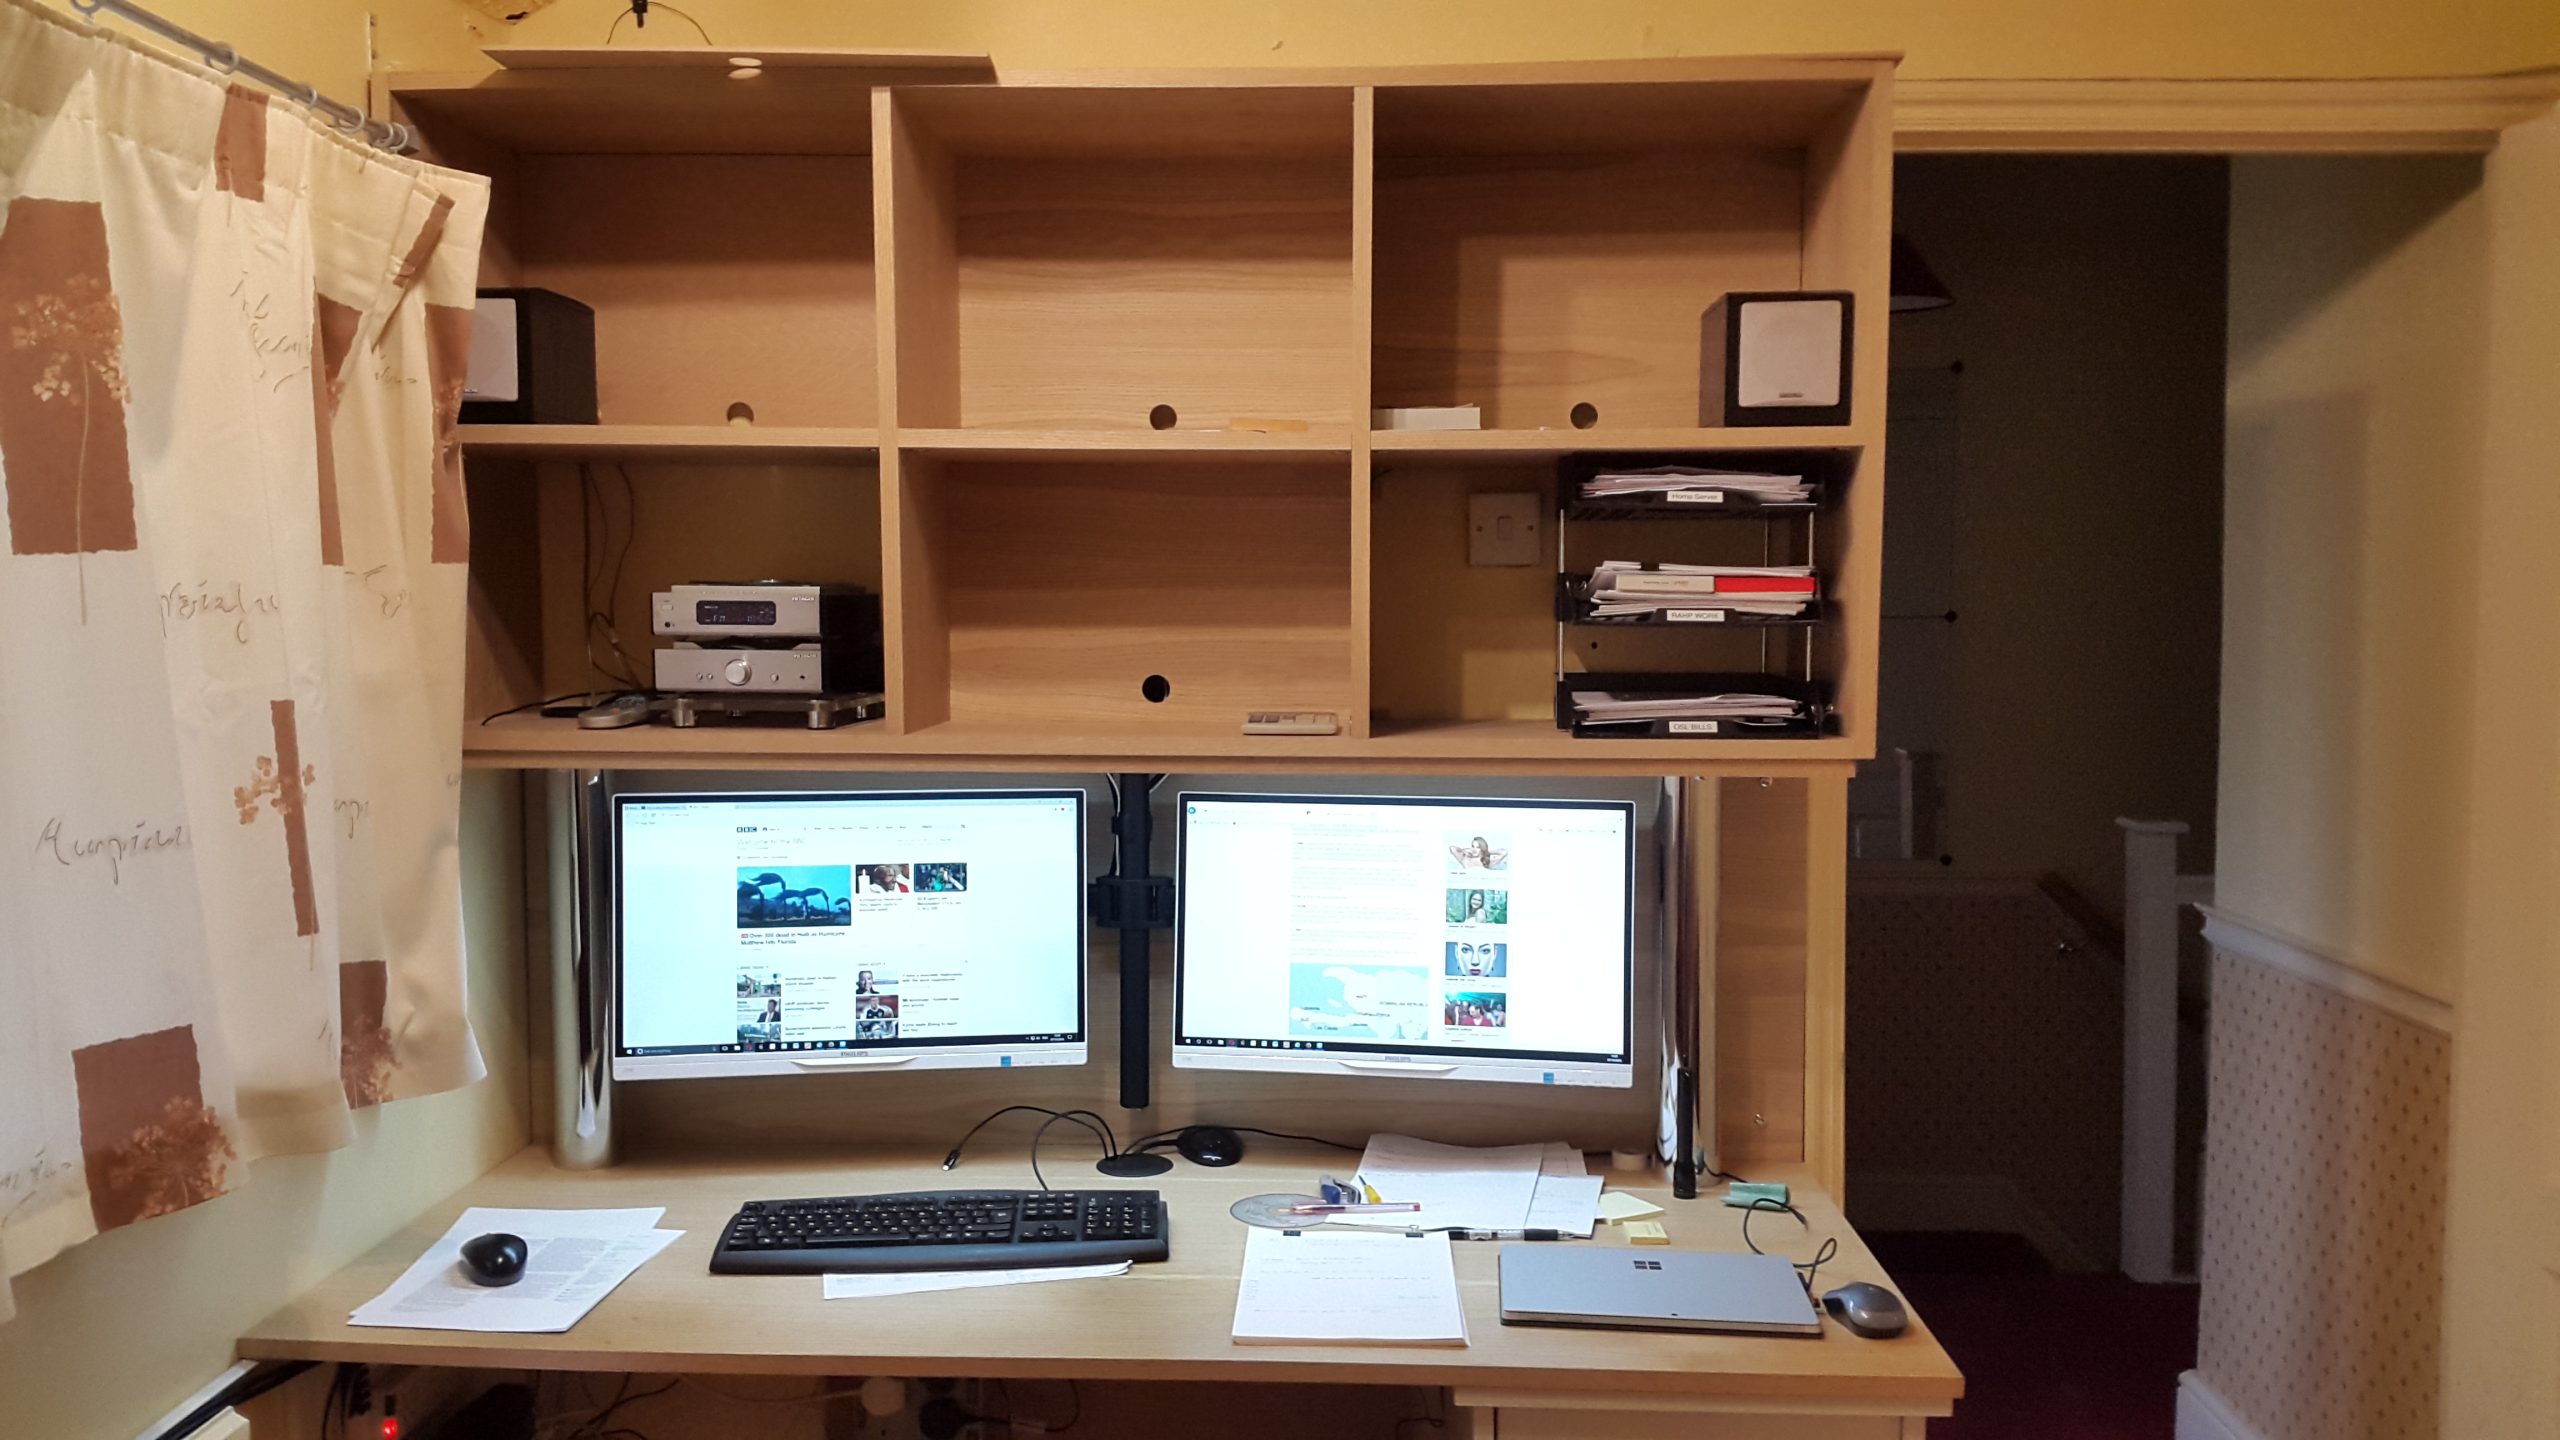
And it’s 99% finished. (Almost) all the sections have the back panels inserted (the light switch is still there 🙂
There’s a set of LED strip lights underneath to provide some decent work lighting – and very conveniently for me, the disastrous first attempt on the bottom shelf has been recycled to become a plinth to hide the light fittings – the power adapter for these also fits behind the centre section.
Just shows the lights a bit more effectively.”
Wow. John has created a unique, bespoke unit that suits his office, and working requirements, perfectly. If you fancy designing something similar, this combination of Flexi shelving and mdf shapes is a genius idea. And don’t forget that we can cut holes in mdf shapes, from circles to triangles to squares and rectangles. Yes, even pentagons, which we’ve made for a customer recently, maybe with a Halloween-type application in mind?
We are very grateful to John for his brilliant narratives, photos and really useful insights into real, live, modern DIY projects. My own toolbox has now been liberated from the cupboard under the stairs, so watch this space!